How I Host this Site
Hosting static content with Google Kubernetes Engine
In my last post, I explained how I am building this site with Hugo, but stopped short on how I host it. In this post, I'll take you through a bit of how Kubernetes works and explain how I'm using it.
Kubernetes Background
Kubernetes is an orchestration system for running containers and automating a range of container-oriented tasks; think things like deployment, scaling, and self-healing. While Kubernetes is well-suited for a variety of applications, its traditional application is running twelve-factor web apps. There is a lot to Kubernetes, and an exhaustive tour is beyond the scope of this post, but I'll try to provide a brief background and explain each piece as I go.
In the beginning, web apps were run on physical servers. When an organization approached their server capacity, they were forced to buy more. This created obvious planning and resource-utilization headaches, the most ironic being servers unable to handle a sudden influx in traffic due to a web app going viral. Broadly the industry would settle on a more sharing-economy approach to computing power, democratizing access to scalable resources with pay-as-you-go pricing. For SaaS, container technology, combined with the ability to automatically create additional VMs via a cloud provider, meant the tools are available for even small organizations to automate this problem away.
And scalability is just one of many concerns that running a web app raises.
What if a container goes down? How do you recognize that and recover? If you are running your app across multiple containers, how do you balance traffic between them?
There are many ways to solve these, but organizations having extensive experience with these types of problems settle on certain approaches being better than others. In one particular case, Google came up with a packaged set of tools written in GoLang based on their own needs. They open-sourced the project and provided it as a free-to-use tool that integrates with cloud APIs.
They named that tool Kubernetes.
Building an Image
In order to host my site, first I'll need an image to run, so I'll build it from my Dockerfile and push it up to Google Container Registry. My Dockerfile is about as simple as it gets:
FROM nginx
EXPOSE 80
COPY public /usr/share/nginx/html
My base image is nginx, a lightweight webserver.
The Dockerfile exposes the standard http port and copies the contents of my public folder to a folder that nginx will look to for serving static content.
In my last post the public folder was created when I ran hugo to generate the html and other files needed for seeing my content outside of Hugo's built-in local server.
Now I'll build the image.
tom@ubuntu:~/git/thomasflanigan$ docker build -t $TOMS_SITE_IMG .
Sending build context to Docker daemon  7.965MB
Step 1/3 : FROM nginx
latest: Pulling from library/nginx
69692152171a: Pull complete
30afc0b18f67: Pull complete
596b1d696923: Pull complete
febe5bd23e98: Pull complete
8283eee92e2f: Pull complete
351ad75a6cfa: Pull complete
Digest: sha256:6d75c99af15565a301e48297fa2d121e15d80ad526f8369c526324f0f7ccb750
Status: Downloaded newer image for nginx:latest
---> d1a364dc548d
Step 2/3 : EXPOSE 80
---> Running in 9da7a9dd02cc
Removing intermediate container 9da7a9dd02cc
---> 62f1ae442966
Step 3/3 : COPY public /usr/share/nginx/html
---> e1670ad1b9a4
Successfully built e1670ad1b9a4
Successfully tagged gcr.io/[GCP_PROJECT_ID]/thomasflanigan:latest
I've set an environment variable TOMS_SITE_IMG in the format gcr.io/[GCP_PROJECT_ID]/[IMAGE_NAME]:[IMAGE_TAG].
Before pushing it out to the registry, I'll run docker run -p 8080:80 $TOMS_SITE_IMG and navigate to http://localhost:8080 to see that site is being hosted in the container correctly.
This might look like a bit of magic. By poking around interactively within the container, a better picture emerges of how this uses the default nginx configuration coming from my image's base layer.
tom@ubuntu:~/git/thomasflanigan$ docker run -it $TOMS_SITE_IMG /bin/bash
root@6113c3fcd402:/# cat /etc/nginx/nginx.conf

user  nginx;
worker_processes  1;

error_log  /var/log/nginx/error.log warn;
pid        /var/run/nginx.pid;


events {
worker_connections  1024;
}


http {
include       /etc/nginx/mime.types;
default_type  application/octet-stream;

    log_format  main  '$remote_addr - $remote_user [$time_local] "$request" '
                      '$status $body_bytes_sent "$http_referer" '
                      '"$http_user_agent" "$http_x_forwarded_for"';

    access_log  /var/log/nginx/access.log  main;

    sendfile        on;
    #tcp_nopush     on;

    keepalive_timeout  65;

    #gzip  on;

    include /etc/nginx/conf.d/*.conf;
}
The /etc/nginx/nginx.conf file is where nginx looks for its configuration.
I could copy my own version of this file into the image and overwrite this one if I needed something more custom.
At the bottom of the configuration I can see that everything with a .conf in the /etc/nginx/conf.d/ directory will be included in the configuration.
While still in the container:
root@6113c3fcd402:/# ls /etc/nginx/conf.d/
default.conf
root@6113c3fcd402:/# cat /etc/nginx/conf.d/default.conf
server {
listen       80;
server_name  localhost;

    #charset koi8-r;
    #access_log  /var/log/nginx/host.access.log  main;

    location / {
        root   /usr/share/nginx/html;
        index  index.html index.htm;
    }

    #error_page  404              /404.html;

    # redirect server error pages to the static page /50x.html
    #
    error_page   500 502 503 504  /50x.html;
    location = /50x.html {
        root   /usr/share/nginx/html;
    }

    # proxy the PHP scripts to Apache listening on 127.0.0.1:80
    #
    #location ~ \.php$ {
    #    proxy_pass   http://127.0.0.1;
    #}

    # pass the PHP scripts to FastCGI server listening on 127.0.0.1:9000
    #
    #location ~ \.php$ {
    #    root           html;
    #    fastcgi_pass   127.0.0.1:9000;
    #    fastcgi_index  index.php;
    #    fastcgi_param  SCRIPT_FILENAME  /scripts$fastcgi_script_name;
    #    include        fastcgi_params;
    #}

    # deny access to .htaccess files, if Apache's document root
    # concurs with nginx's one
    #
    #location ~ /\.ht {
    #    deny  all;
    #}
}
From the server directive we can see the same port 80 that was exposed in the Dockerfile.
From the location section within that we can see that nginx is using /usr/share/nginx/html to look for content.
Nginx will serve any index.html files for paths under that location, the same one the Dockerfile copies my content to.
So the "magic" is really just relying on the default nginx configuration coming from the base image and copying the site's content into the default folder.
Finally, I'll push the image up to the registry.
tom@ubuntu:~/git/thomasflanigan$ docker push $TOMS_SITE_IMG
Using default tag: latest
The push refers to repository [gcr.io/GCP_PROJECT_ID/thomasflanigan:latest]
35e0dc2a6cbb: Pushed
075508cf8f04: Layer already exists
5c865c78bc96: Layer already exists
134e19b2fac5: Layer already exists
83634f76e732: Layer already exists
766fe2c3fc08: Layer already exists
02c055ef67f5: Layer already exists
latest: digest: sha256:2a22fffa87737085ec8b9a1f13fff11f9b78d5d7a3d9e53d973d2199eae0dbdc size: 1781
Kubernetes Controllers
To get my image running in Kubernetes, I'll define a number of Kubernetes objects using a yaml file. A single instance of Kubernetes is called a cluster and configuration can be defined declaratively. This means I can describe my desired state via versioned files, and Kubernetes will use controllers corresponding to each object I define until the observed cluster state matches the one I defined.
In contrast, setting up a web app the traditional way involved a set of instructions run imperatively; analogous to giving someone directions from point A to B. Today with an online map service, instead of directions, we could specify the end destination B only, and let the service worry about the rest, not having to worry about point A at all. Kubernetes lets you take a similar approach, in my case, for running my site's image and defining the infrastructure for it.
Namespace
First I'll start by defining a namespace. Namespaces are a good way to keep things isolated in the cluster. If I left this out, Kubernetes would place all my resources in the default namespace, so I'll explicitly create one specifically for my site.
apiVersion: v1
kind: Namespace
metadata:
  name: thomasflanigan
Deployment
Next I'll need to run a container for my nginx image. I can use a Deployment to do so.
apiVersion: apps/v1
kind: Deployment
metadata:
  name: site
  namespace: thomasflanigan
spec:
  replicas: 1
  selector:
    matchLabels:
      app: site
  template:
    metadata:
      labels:
        app: site
    spec:
      containers:
      - name: nginx
#       Meant to be run with envsubst
        image: $TOMS_SITE_IMG
        imagePullPolicy: Always
        ports:
        - containerPort: 80
A Deployment is a wrapper for running Kubernetes Pods, which in turn can run one or more containers.
With replicas: 1 and the containers: list, I am telling my cluster I want a single container of my site exposed on port 80.
I also specify a selector so that I can target this container with a Service resource.
Service
Services allow you to manage connectivity to Kubernetes Pods.
Here I define a NodePort type Service, with a selector that will match any Pods with an app: site matchLabel.
In my case, this is a single Pod with my one container in it.
apiVersion: v1
kind: Service
metadata:
  name: site-svc
  namespace: thomasflanigan
spec:
  selector:
    app: site
  type: NodePort
  ports:
  - protocol: TCP
    port: 8080
    targetPort: 80
Testing it out so far
So far I have just been talking about yaml files, but I haven't told the cluster to make it so yet.
I'll need to hop onto my cloud shell environment where I have already created a GKE instance.
Here I'll use the kubectl apply command to have my cluster start running the Service.
In order to swap in my environment variable for my site image, I'll use envsubst and pipe the result to the kubectl command.
tom@cloudshell:~/git/thomasflanigan $ cat k8s-config.yaml | envsubst | kubectl apply -f -
namespace/thomasflanigan configured
deployment.apps/site configured
service/site-svc configured
I'll make sure the Pod and Service started okay, and then use kubectl port-forward to preview the site.
tom@cloudshell:~/git/thomasflanigan $ kubectl get pods -n thomasflanigan
NAME                    READY   STATUS    RESTARTS   AGE
site-594ccf99c8-wwn28   1/1     Running   0          12m
tom@cloudshell:~/git/thomasflanigan $ kubectl get svc -n thomasflanigan
NAME       TYPE       CLUSTER-IP    EXTERNAL-IP   PORT(S)          AGE
site-svc   NodePort   10.60.14.87   <none>        8080:31208/TCP   12m
tom@cloudshell:~/git/thomasflanigan $ kubectl port-forward service/site-svc -n thomasflanigan 8080:8080 >> /dev/null
With the Service port forwarded, I can use the web preview feature in Google Cloud Shell to preview the site.
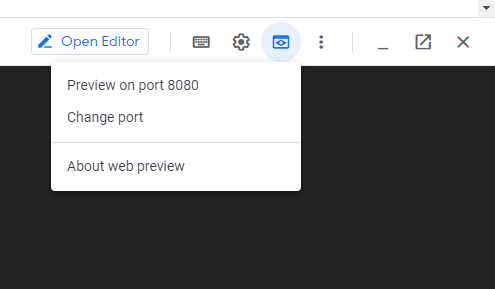
This will launch the site at a temporary url. It works!

Ingress
With things working inside the cluster, the final step is to expose it to the web more permanently. I have reserved a static external IP named 'thomasflanigan' in my GCP project to reach the outside web. I can use an Ingress to connect the static IP to my Service.
apiVersion: networking.k8s.io/v1
kind: Ingress
metadata:
  annotations:
    kubernetes.io/ingress.allow-http: "false"
    kubernetes.io/ingress.global-static-ip-name: thomasflanigan
    networking.gke.io/managed-certificates: site-cert
  name: site-ingress
  namespace: thomasflanigan
spec:
  rules:
    - http:
        paths:
          - path: /*
            pathType: ImplementationSpecific
            backend:
              service:
                name: site-svc
                port:
                  number: 8080
Under spec.rules.http[0].paths, I can list one or more paths.
Here I am saying everything going to my static IP from the root path down will be sent to my site-svc.
I am also turning off http access to run my site under https only. I get the SSL termination from referencing a managed certificate.
Managed Certificate
If you take a look back at the above yaml code, you may notice it has been necessary to specify an apiVersion. Up until this point, I have been using yaml that defines resources built-in to Kubernetes. Kubernetes also allows for custom resources powered by custom controllers. Notice the apiVersion below specifies GKE, a Google-specific cloud service, since I am defining a custom resource tied to a Google-managed SSL certificate. Resources like this will differ for each cloud provider.
apiVersion: networking.gke.io/v1beta1
kind: ManagedCertificate
metadata:
  name: site-cert
  namespace: thomasflanigan
spec:
  domains:
    - thomasflanigan.com
In order for the cert to work, I'll need to point my thomasflanigan.com domain to the static IP address I created. Using a managed cert is convenient, since I don't ever have to worry about renewing the certificate manually (managed certs auto-renew). I will need to wait a few minutes for the certificate to provision, so I'll apply it now.
tom@cloudshell:~/git/thomasflanigan $ cat k8s-config.yaml | envsubst | kubectl apply -f -
namespace/thomasflanigan unchanged
deployment.apps/site unchanged
service/site-svc unchanged
ingress.networking.k8s.io/site-ingress configured
managedcertificate.networking.gke.io/site-cert configured
After some time, I can check on the cert and see it provisioned, and my site will be available.
tom@cloudshell:~/git/thomasflanigan $ kubectl get managedcertificate site-cert -n thomasflanigan -o jsonpath='{.status.certificateStatus}'
Active
Conclusion
I have really only scratched the surface with Kubernetes here. There is a lot more I could do to improve the backend, but this will suffice for a static site for now. In fact, Kubernetes is so powerful that using it for only a static site is complete overkill, but I plan to add to this cluster over time.
To see the complete yaml configuration, take a look at it on my github.